How to use Drip
Updated 14 November 20264 minute read
The short answer
Drag any file up to the notch. It opens with the jobs that fit that file. Point at one to see what it will do, let go, and the finished file comes back out of the notch for you to drag on.
The five steps
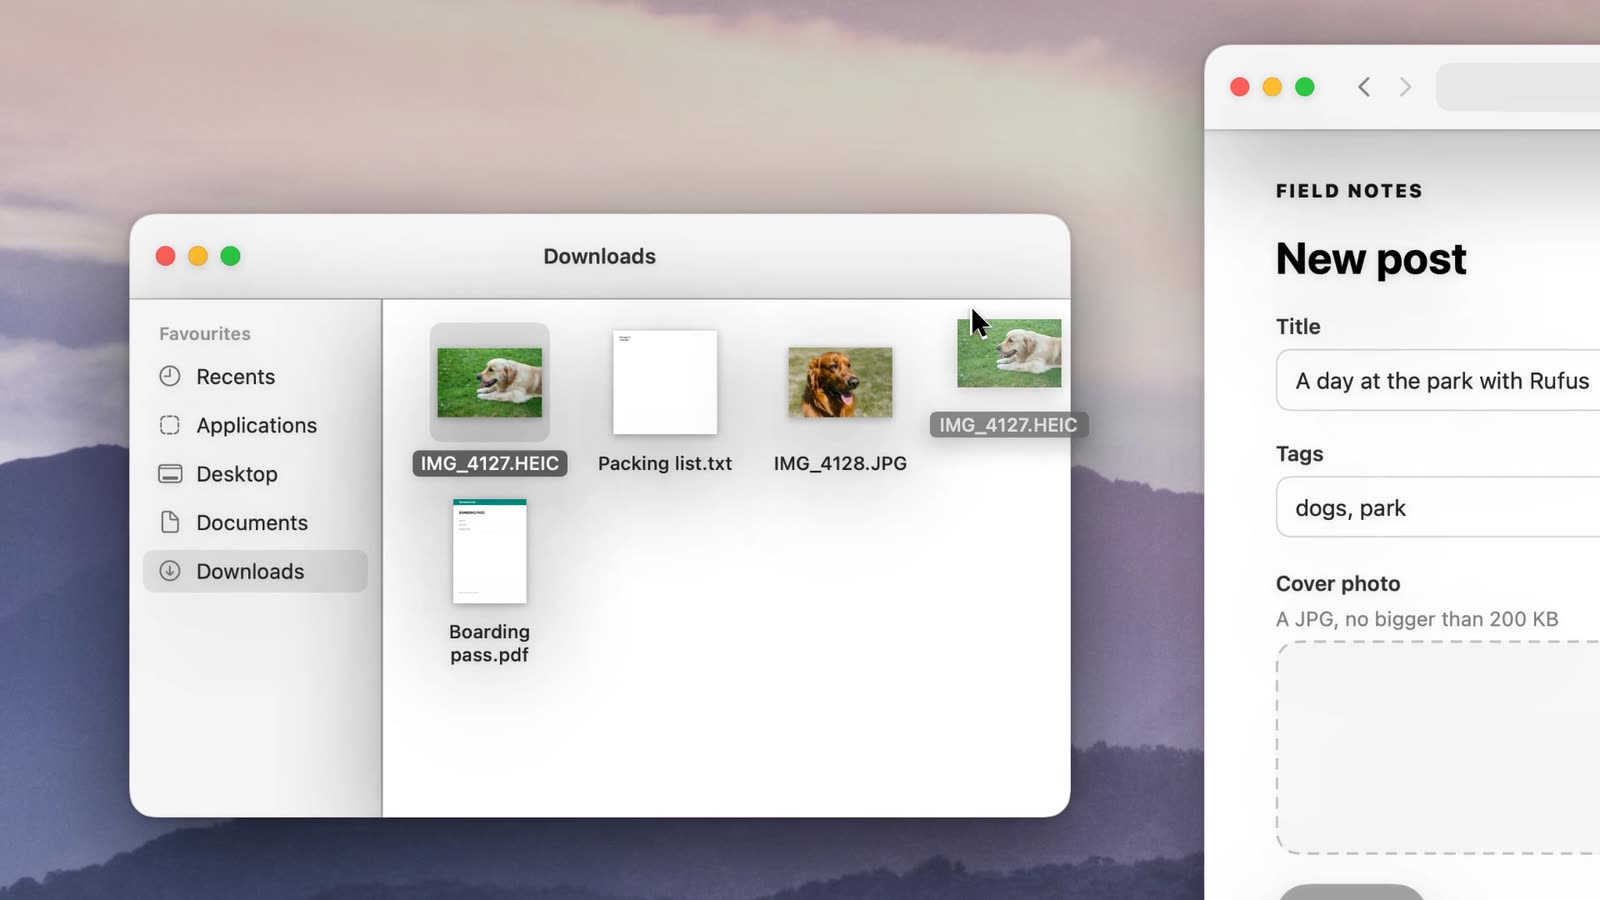
- Bring a file up to the notch. Start dragging any file, from Finder, the desktop or another app, and carry it to the notch. On a Mac or display without a notch, carry it to the top middle of the screen, where the notch would be.
- The notch opens with the jobs that fit. A photo gets Make it a JPG, Shrink it and size limits. Two PDFs get Join them first. A video gets Small enough for email. The likeliest one is marked Suggested.
- Point at a job. Its tile shows the change on your own file, and the top right says what happens if you let go there. Some tiles have choices along their foot, like 50 KB, 200 KB and 1 MB: move along them to pick one.
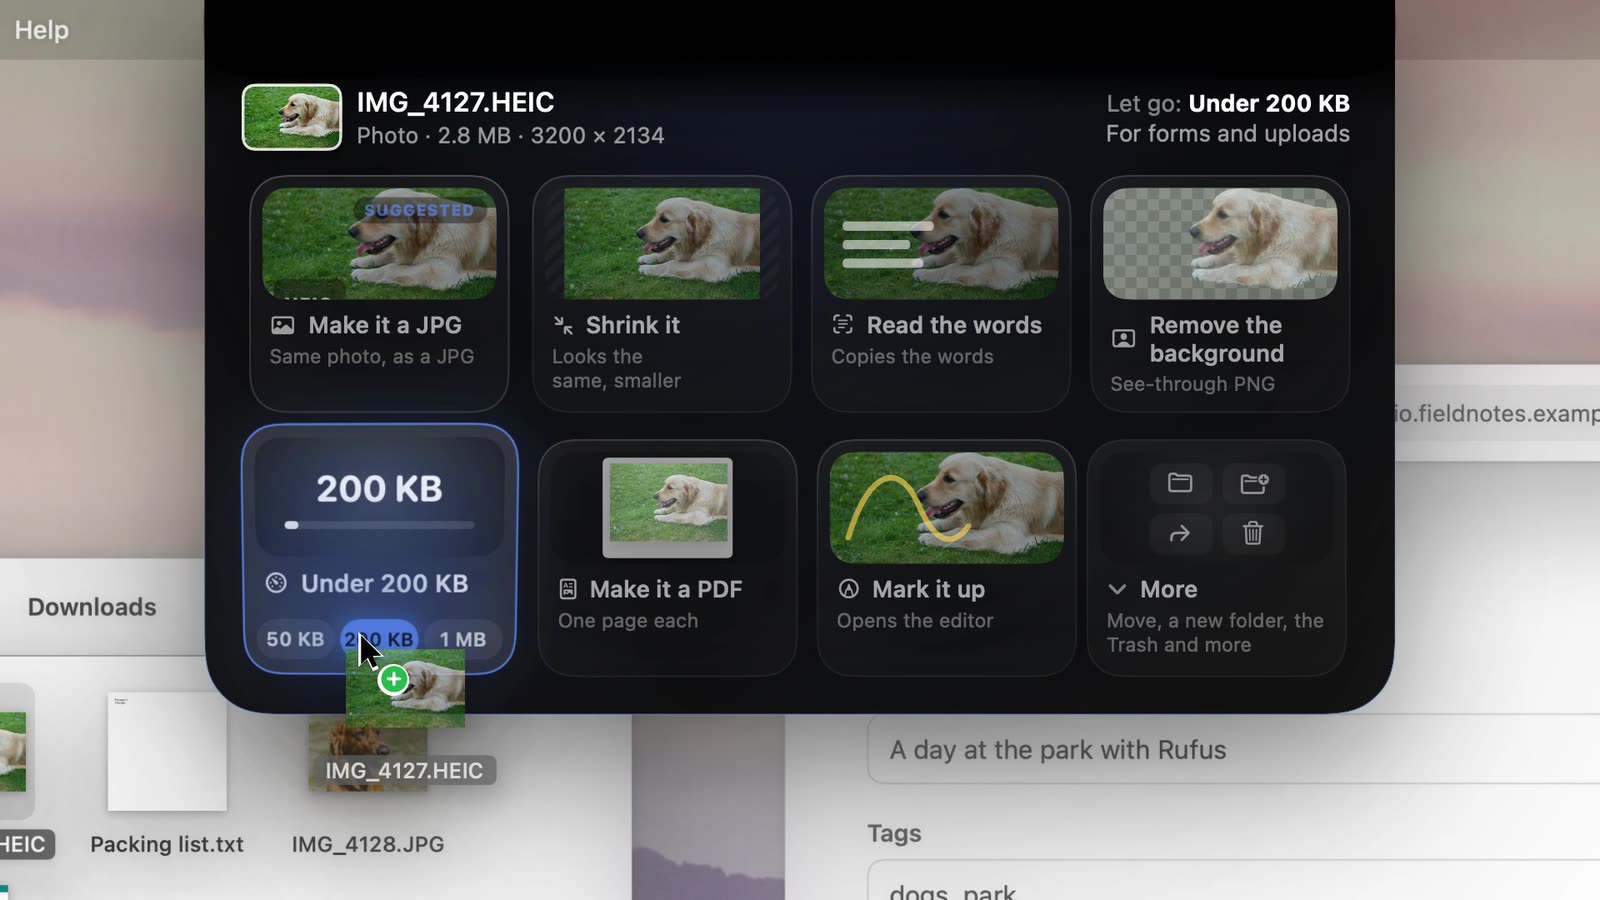
Pointing at Under 200 KB. The top right reads “Let go: Under 200 KB”. - Let go. Drip does the job on your Mac. The finished file comes back out of the notch with its new size, for example 2.8 MB → 195 KB.
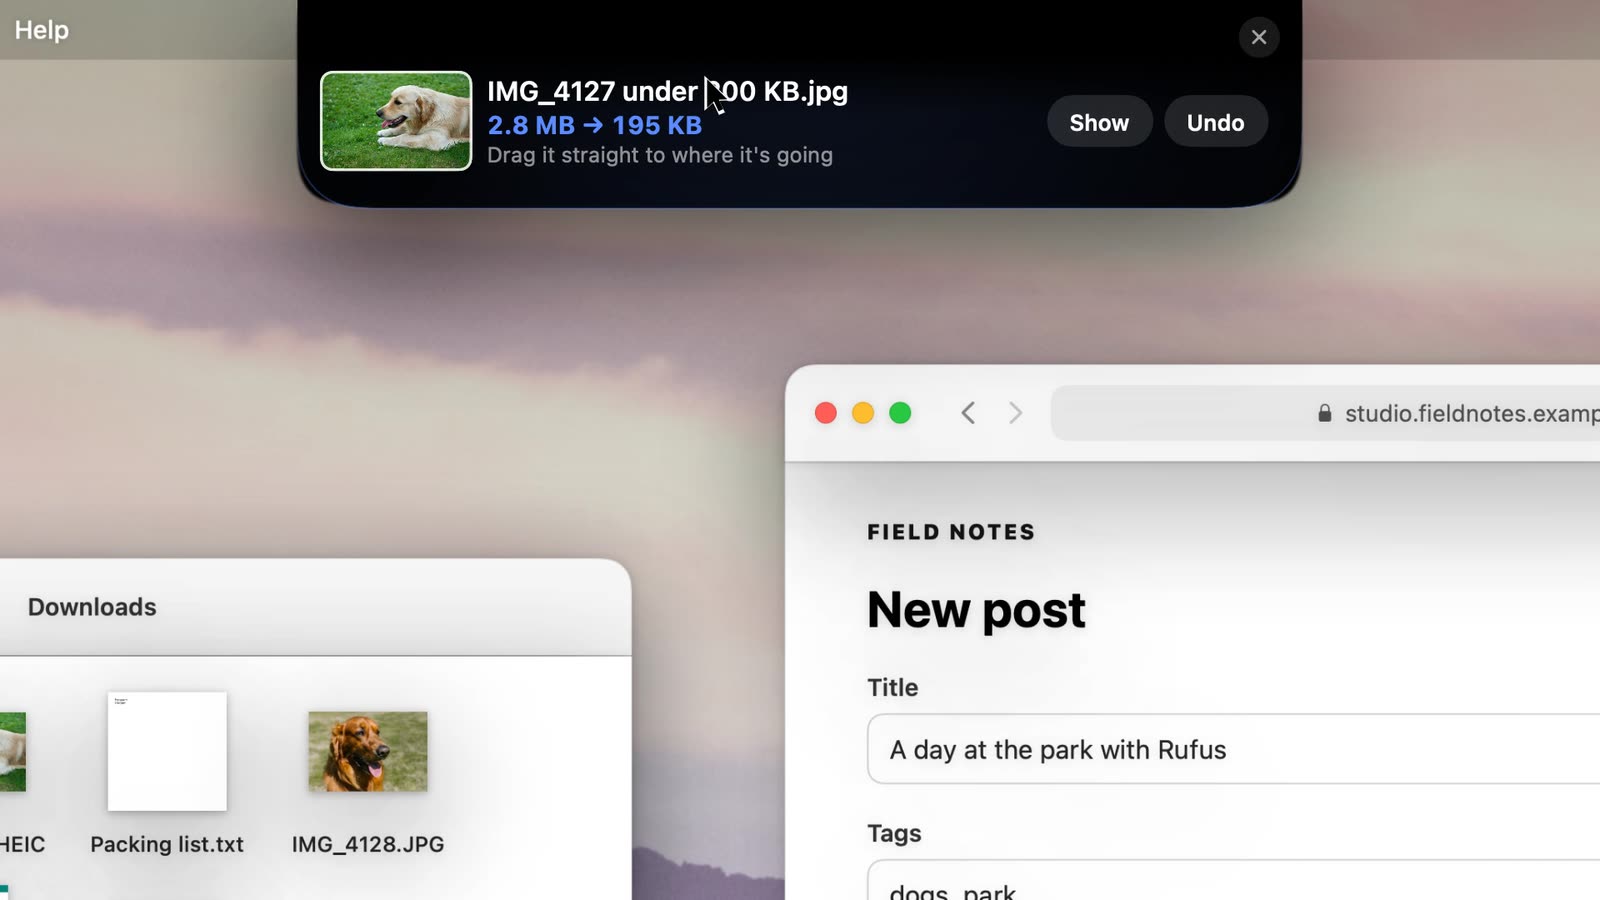
The finished file waits in the notch, with Show and Undo. - Drag it on. Drag the finished file from the notch straight into a form, an email or a folder. Or choose Show to see it in Finder, or Undo.
More: moving and tidying, for any file
The last tile is More. Hold a file over it and the notch grows to show the jobs every file has: move it to Desktop, Documents or Downloads, put it Into a new folder, Move to… any folder, copy it somewhere, zip it, copy its path, or send it to the Trash. Moves and the Trash have Undo.
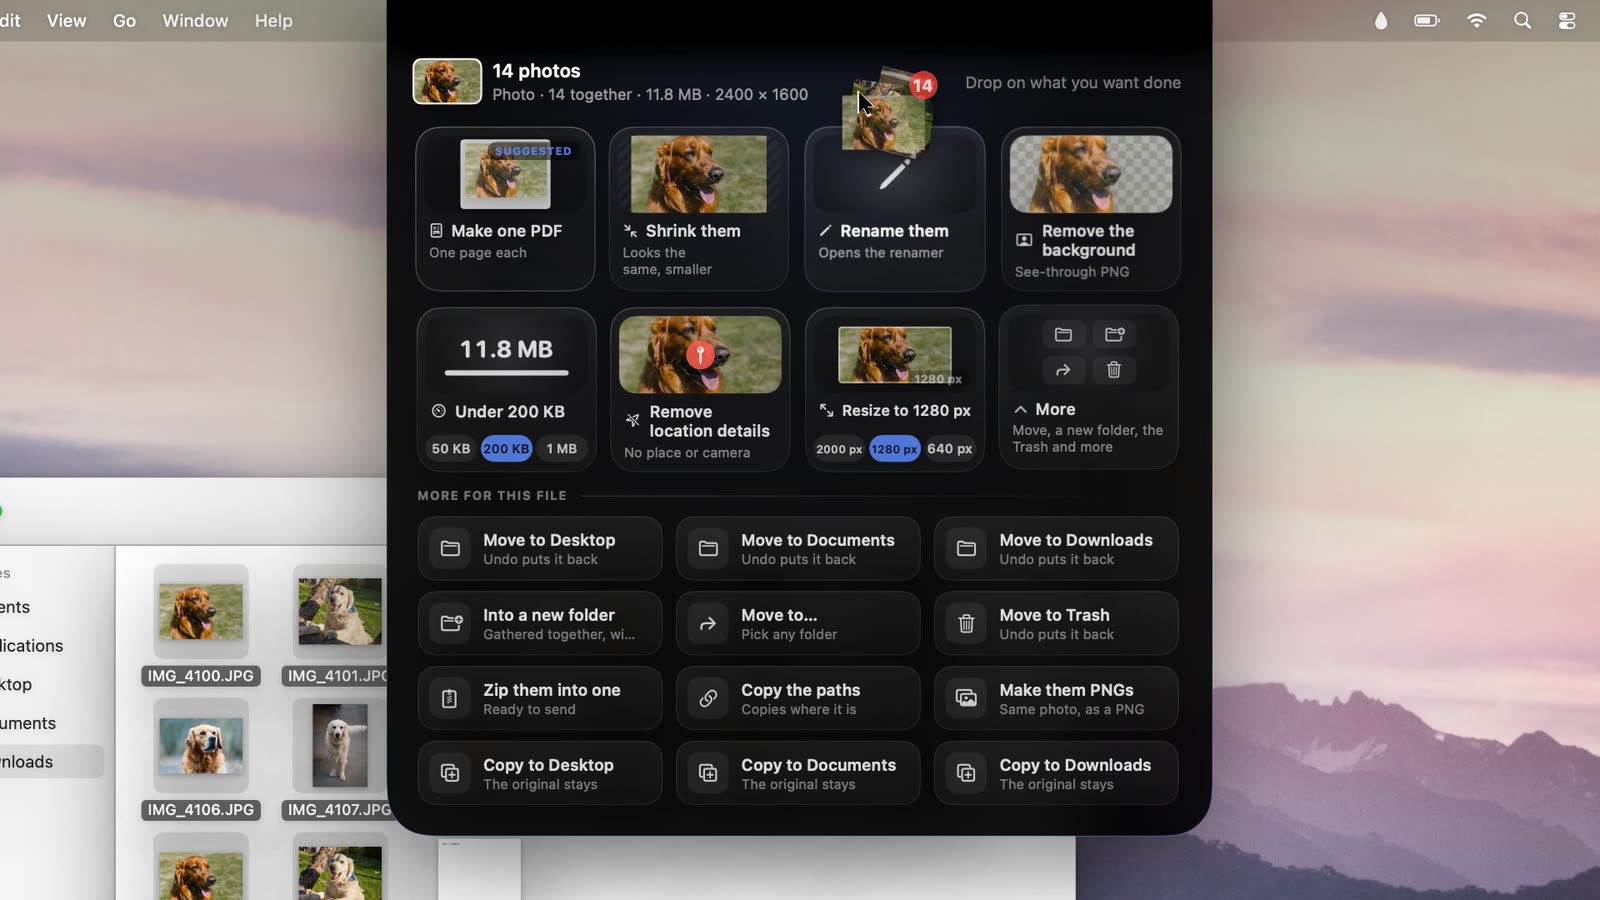
What Drip offers, by kind of file
| A photo or picture | Make it a JPG or a PNG, Shrink it, Under 50 KB / 200 KB / 1 MB, Resize to 2000 / 1280 / 640 px, Remove the background, Remove location details, Read the words, Make it a PDF, Mark it up, Put it in a frame |
|---|---|
| A PDF | Shrink it, Under 1 MB / 2 MB / 5 MB, Pages to pictures, Copy the words, Sign or split |
| Two or more PDFs | Join them, Shrink them, Under a size, Pages to pictures, Sign or split |
| A video | Shrink it, Small enough for email / WhatsApp / Discord, Make it an MP4, Make a GIF, Just the sound, Grab a picture |
| A large sound file | Make it smaller (WAV, AIFF, CAF or FLAC to M4A) |
| Several files | The jobs for their kind, made for each one, plus Rename them |
| Any file or folder | Zip it (Unzip it for a zip), Move to Desktop / Documents / Downloads, Into a new folder, Move to…, Copy to…, Copy the path, Move to Trash, Keep it on the shelf |
Where the finished file goes
Next to the original, in the same folder, with a name that says what changed: IMG_4127.HEIC becomes IMG_4127 under 200 KB.jpg. The original is left as it was, and nothing is overwritten: if a name is taken, Drip adds a number. Files that don’t live in a folder of yours, like a photo dragged out of Photos or an attachment out of Mail, go to Downloads.
The first time Drip works in your Desktop, Documents or Downloads folder, macOS asks whether it may. Choose Allow so the new file can go beside the old one.
Undo
Undo sits next to the finished file while it’s in the notch. It moves what Drip made to the Trash, or puts moved files back where they were.
Keeping it out of the way
Drip does nothing until a file you’re dragging reaches the notch. It doesn’t scan your files or run jobs in the background. If you’d rather it stayed out of one app, right-click the open notch and choose Not while I’m in…. For a break, choose Take an Hour Off from the drop icon in the menu bar.
The free trial
All of Drip is yours for 7 days from the first time you open it, with no account and no card. After that it’s $7.50 once for one Mac. More on the Help page.