Turn a screen recording into a GIF on a Mac
Updated 14 November 20263 minute read
The short answer
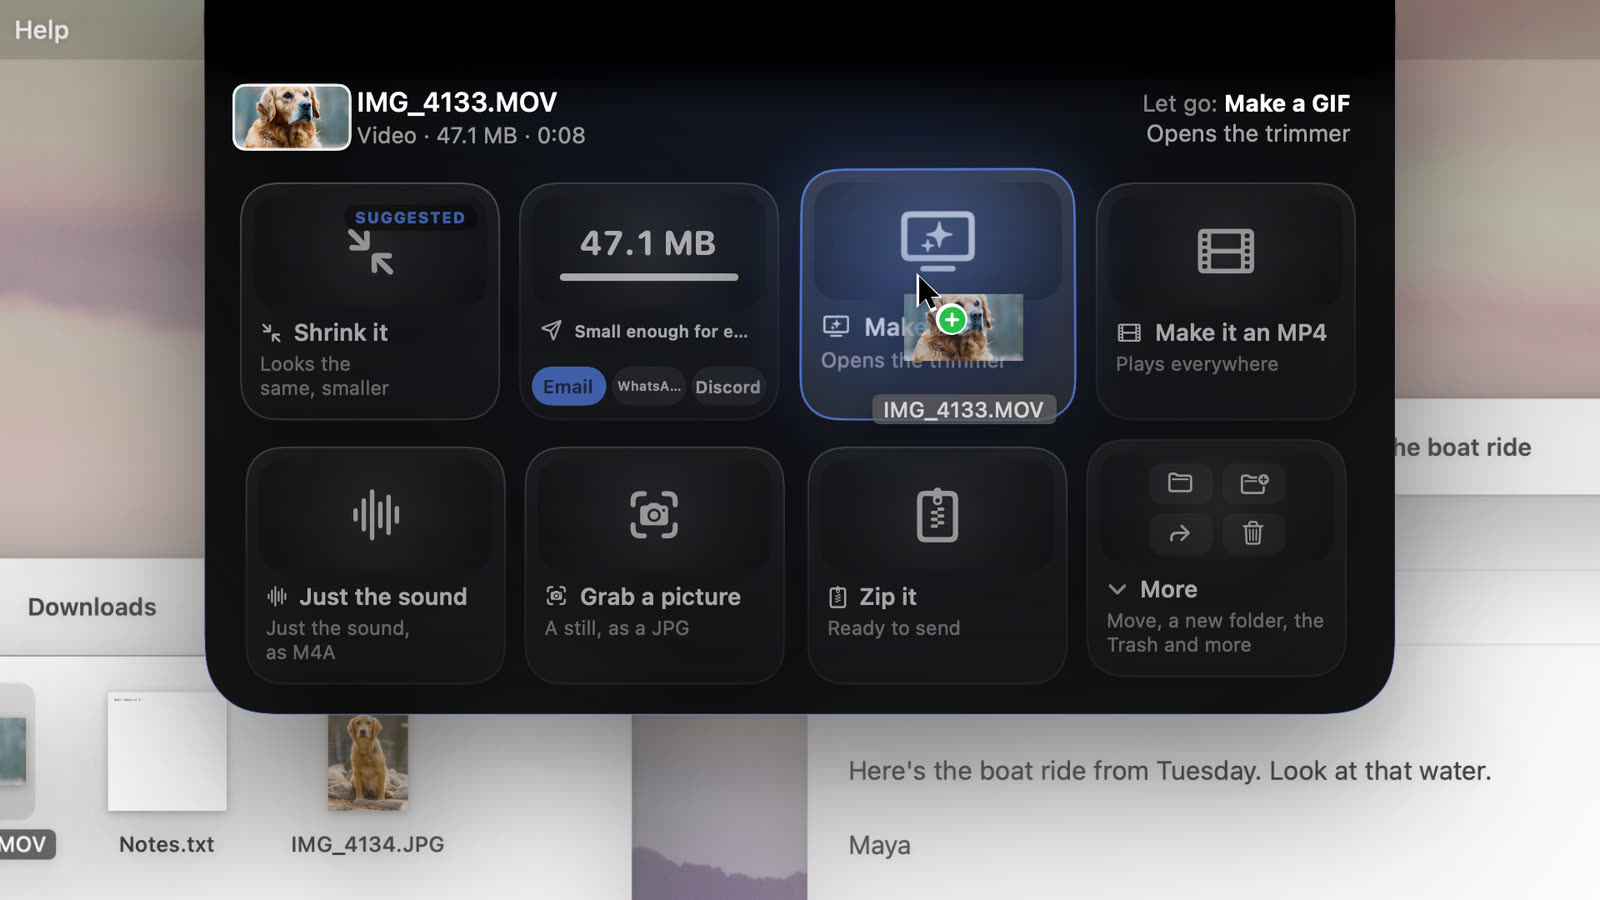
Drag the recording up to the notch and let go on Make a GIF. A window opens with your video: trim it to the part you want, choose a width and frame rate, and choose Export GIF….
Steps
- Record your screen, or find the video. Shift-Command-5 records the screen on any Mac. Drip takes .mov, .mp4 and .m4v files your Mac can play, not only screen recordings.
- Drag it up to the notch.
- Let go on Make a GIF. The top right says “Opens the trimmer”: Drip’s Video to GIF window opens with your video in it.
- Trim it. Drag the handles on the bar under the video to keep only the part you need. The arrow keys move a handle by one frame.
- Choose the settings.
- Width: 320, 480, 640, 800 or 1024 px, or Original.
- Frame rate: 8 to 30 frames a second. It starts at 15.
- Quality, Speed (from half speed to 3×) and Loop (forever, once, twice, 3 or 5 times).
- Dither keeps gradients and shadows smooth, at the cost of a bigger file.
- Choose Export GIF… and pick where to save it.
Keeping a GIF small
- Keep it short. Every second adds frames, and GIFs grow fast.
- 640 or 800 px wide is plenty for a chat or a README; 12 to 15 frames a second looks smooth for most screen recordings.
- Many places, including Slack, X and GitHub issues, play a short MP4 as well as a GIF, at a fraction of the size. The same window makes an MP4: switch it from GIF to MP4. Or skip the window and let go on Shrink it or Small enough for email.
Other jobs for a video
Grab a picture saves a still as a JPG. Just the sound saves the audio as an M4A. Make it an MP4 turns a .mov into an MP4 that plays everywhere. Each makes a new file beside the video.
Without Drip
macOS has no menu item for this. The Shortcuts app has a Make GIF action you can build a shortcut around, and free apps such as Gifski do it well. Drip’s way starts from the notch, with the trim and settings in one window.